More data is better
10/01/2021. Unfortunately, it is worthwhile to collect multiple thousands of frames and construct solar images from at least a few hundred of them. The results are clearly better than using 125 from 1,000 frames. Come to think of it, I haven't tried keeping say 400 frames from a 1,000 frame "snapshot."
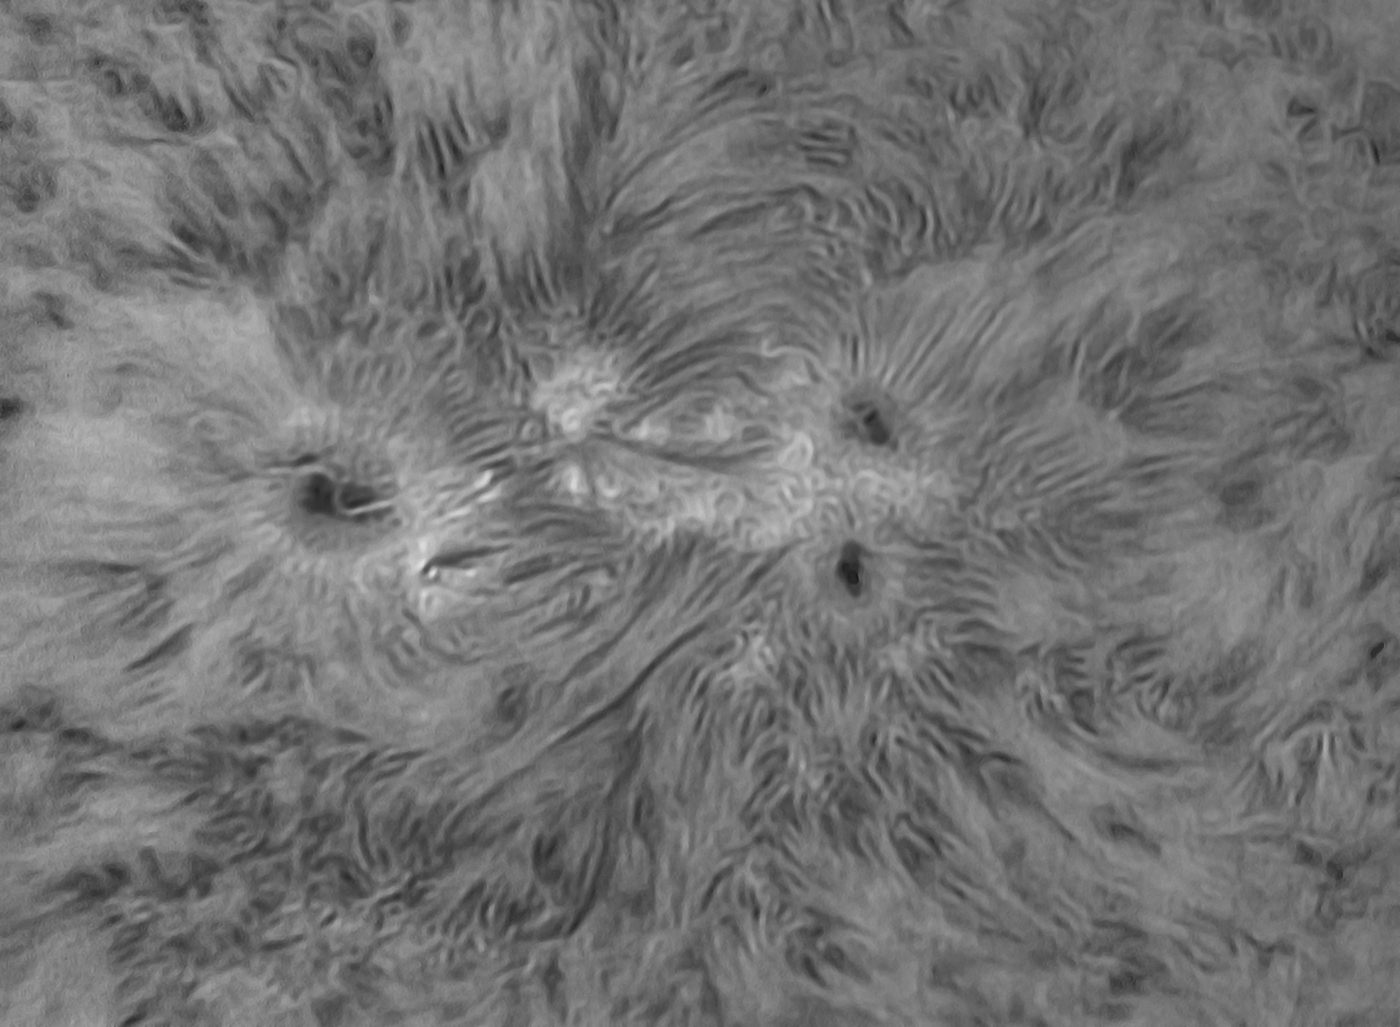
Here, just for giggles, are four images from today and yesterday. The sky was not particularly transparent, and the seeing was only a little better than usual. Each finished photo is a stack of 500 or 600 frames from 2,000 or 3,000 frame clips. View them large to see them at their best.
Yesterday:
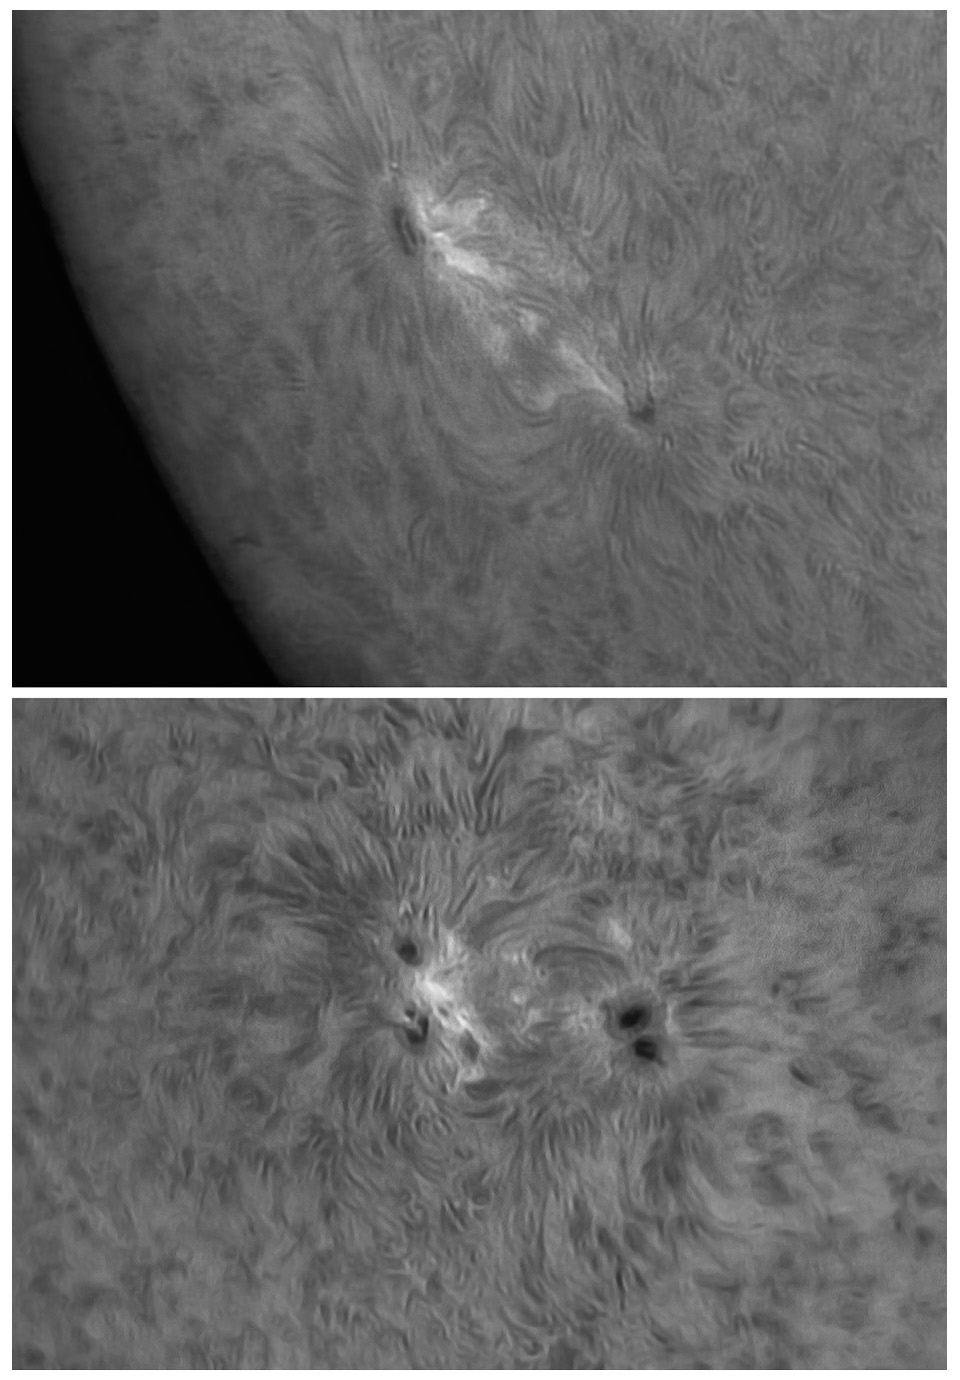
Today:
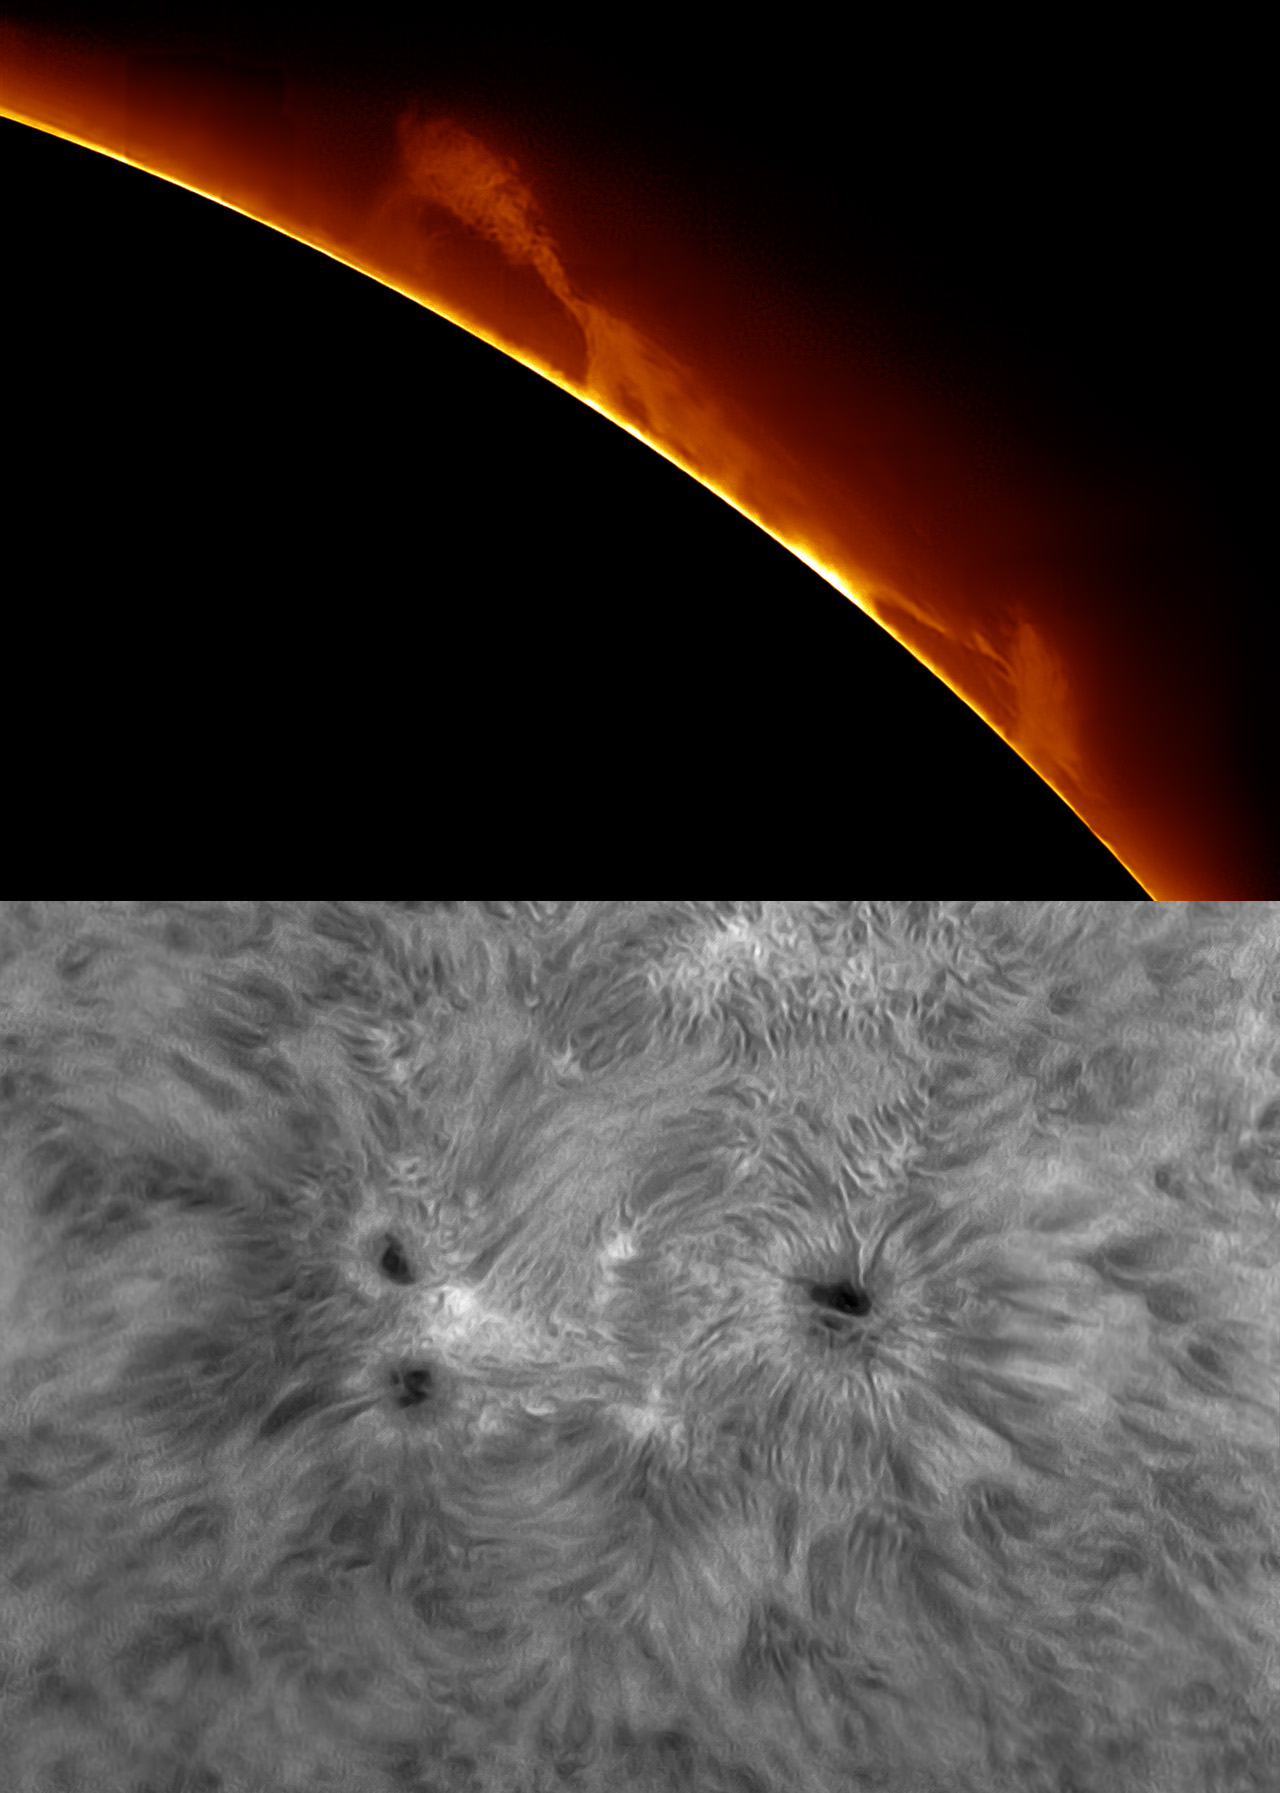
I'm using Firecapture for data. The surface details are all collected with gamma enabled and set to max. ROI is 2,100x1600. That yields about 55 FPS. Flat-fielding is via a 15-image stack captured at an extreme extra-focal camera position. The surface exposures run about 1.5 ms with gain 240-ish. The prominence photo was captured with gamma off and an exposure of 10ms.
Initial processing is with IMPPG (some deconvolution and some USM). Photoshop provides some polish. The prominence photo suffered from the Sony Exmor 178's infamous fine lines, all nicely removed in PixInsight. I need to pick a good example and document that fix (promises, promises, eh?).
I've ordered two more 2TB drives. And I'm doing my best to burn less storage by taking just one good capture per feature rather than a few mediocre ones. When possible, I should also drop the ROI to 1600x1200 or so. That would give me faster captures, less storage per clip or taller stacks for the same storage, and more even field illumination (though with flatfields, that's almost but not quite moot).
10/02/2021. So I did as I threatened, dropped the rez to 1600x1200, and took 10,000 frames in about 80 seconds. Polar alignment was a bit off, and I messed up trying to keep things centered, so I ended up with a useful 8,000-frame clip. I've used AutoStakkert!3 to make images from the best 3000, 1000, 500, 160, 80, and 40 frames, most with 1.5x drizzling. Note that the tall stacks take a while and nevermind that you're running an overclocked hexacore i7 with SSDs and a RAMdrive. I do not expect to take such tall stacks very often, but it was a useful experiment. As you'd expect, 40 frames is nowhere near enough to control noise, and it doesn't matter how great they might be. 80 is very thin, as well, but 160 is getting good. There is nothing wrong with 500:
500 of 8,000
Incidentally, these sunspot group photos
are sometimes
flipped around depending on which side of the meridian the telescope is on.
The 500-frame stack looks just as smooth and is actually a little sharper, as you'd expect from using only the best 6.3% of the data rather than the best 32% when both stacks are deep enough to control noise. Processing is very much quicker with 500 subs than with 3,000. The sweet spot (today) was between 500 and 160 frames. Live and learn.
First take-away: I should audition SharpCap. That would be my third candidate for this season after ASICap and FireCapture.
Also, I should capture data without a gamma correction. I tried this on another recommendation, and while the video is not pretty, the data are fine, and all the tones can be recovered in post. Remember that the product is the finished image and that no one will ever see the video. So crank the gamma to focus in Firecapture, then turn it off and use faster exposures. I tried a 1,000 frame no-gamma capture, and it worked just as expected: ugly video but a lovely image. (Better? Maybe, probably, in principle...) Try .SER files with more bit depth again, too, now that you have the hard- and software to take advantage of them.
SharpCap would let me do a live histogram stretch for critical focusing and casual look-abouts, and has a robust provision for flats, darks, etc. The free version is installed and ready to try.
Not five minutes later: clearly the features that make SharpCap really attractive are among its premium bits, so I've happily ponied up for the pro version (~16$/year) and have been putting it through its paces as the weather allows (which is to say, indoors). I'm using my ancient ASI120MM to learn where SharpCaps's buttons are. Nice touch: SharpCap has a utility to measure (and display) the characteristics of the particular sensor in use and then apply them to opimize this and that.
Here's a minimal, first-cut workflow with some hints about where to look for options. This is after playing around for just one afternoon, so it's a long way from authoritative:
Using SharpCap.
- Select camera and Live View.
- Prepare a flat. First, defocus the camera, use a diffuser, or a flat target.
- Set type of image to FLAT FRAMES
- Select CAPTURE / CAPTURE FLAT
- Adjust exposure and / or gain to produce a mid- to middle-right histogram. Take associated coaching with a grain of salt. When you can see the frame's faults and the histogram is at least vaguely centered, take the flat. Use the option which also takes and subtracts bias frames.
- Prepare to take image data. Re-set type of image to LIGHT FRAMES
- Find target, focus, set exposure. (Use histogram auto-stretch to help with focus.)
- If appropriate, adjust the ROI via the Camera Control Panel which may be minimized to the right. Note that you if your flat was acquired with a large ROI you can reduce the ROI without taking a new flat (hooray! I've actually put myself to sleep thinking about why Firecapture doesn't permit that).
- Select START CAPTURE, and set frame-count or time limits.
- Click START to take video. (A progress bar appears in the lower right of the screen if limits are set.)
- VIDEO is stored in Desktop/SharpCap Captures. You can reset that directory, but your change apparently will not stick when you re-start SharpCap.
Clear weather please.
And so help me, since I have the camera and the software and some of the technique, let's finally get down to business with the planets and the Moon. I've located my Baader 685nm IR pass filter, ordered a dirt-cheap Barlow (for $15 I'd rather not disassemble the solar kit at all), and started reviewing opportunities to image some interesting real estate on the Moon (early mornings for a while). I thought I had a deeper IR filter around here somewhere, something in the 742nm range or maybe even beyond 800, but I must have only thought about those (here's one of the most recent times I used this filter; click and scroll down: 20120605s.php). How about 5,000 frames at 4,000mm EFL behind the 10-inch R-C? Am I going to be transporting it to the community lot to escape these trees? Place yer bets.
Now and then I look back at all these solar pages. And I do not see unambiguous progress. I am more consistent, maybe, and I have a better understanding of what works. I am happier with the 90mm kit and less tempted to make wholesale hardware mods (says the guy who came that close to trading the Lunt for a Quark). But the newest pix just aren't dramatically better than many older ones. One thing: the penumbral features I'm shooting right now are smaller, so wait for the Sun to wake up before despairing. I re-experience the same insights every few years. But it's fun.
One must imagine Sisyphus happy.